Locating a Remote Premier Server
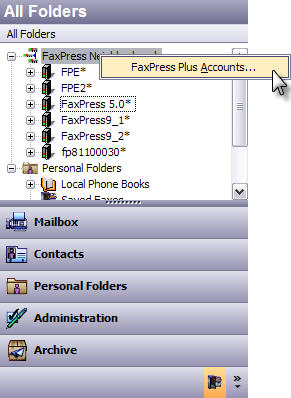
| 1. | From the All Folders view, right-click on FaxPress Neighborhood and select FaxPress Accounts... |

| 2. | The FaxPress Accounts window displays all the FaxPress Premier servers installed on your network segment in the right panel. FaxPress Premier servers installed on a different network segment are automatically displayed on the left. |
To add a FaxPress Premier server installed on another segment of your Windows network, to your list of available servers, click on the TCP/IP Advanced button in the FaxPress Accounts window.

The TCP/IP Advanced button will be inactive if the server selected is installed on a Novell network.
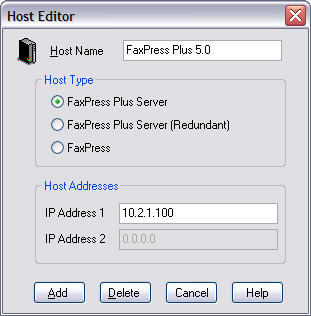
| 3. | In the Host Editor window, use the Host Name field to enter a name for the remote FaxPress Premier server you want to add. |

In the Host Type field, select the FaxPress Plus Server radio button.
In the IP Address field, enter the IP address assigned to the FaxPress Premier server you want to connect to. Ask your network administrator for the correct IP address.
| 4. | Click Add to add the server to your list of available FaxPress Premier servers. The new server will be displayed in the server list in the left panel with an asterisk before its name, designating this server as a user defined server. |
| 5. | Click OK to return to FaxPress Plus and double click on your FaxPress Neighborhood folder. Your remote server should now be displayed. |
|
FaxPress Premier WebHelp
Last Updated: 11/1/2007
E-mail this page |
Castelle 855 Jarvis Drive, Suite 100 Morgan Hill, CA 95037 Toll-free 800.289.7555 Tel 408.852.8000 Fax 408.852.8100 |